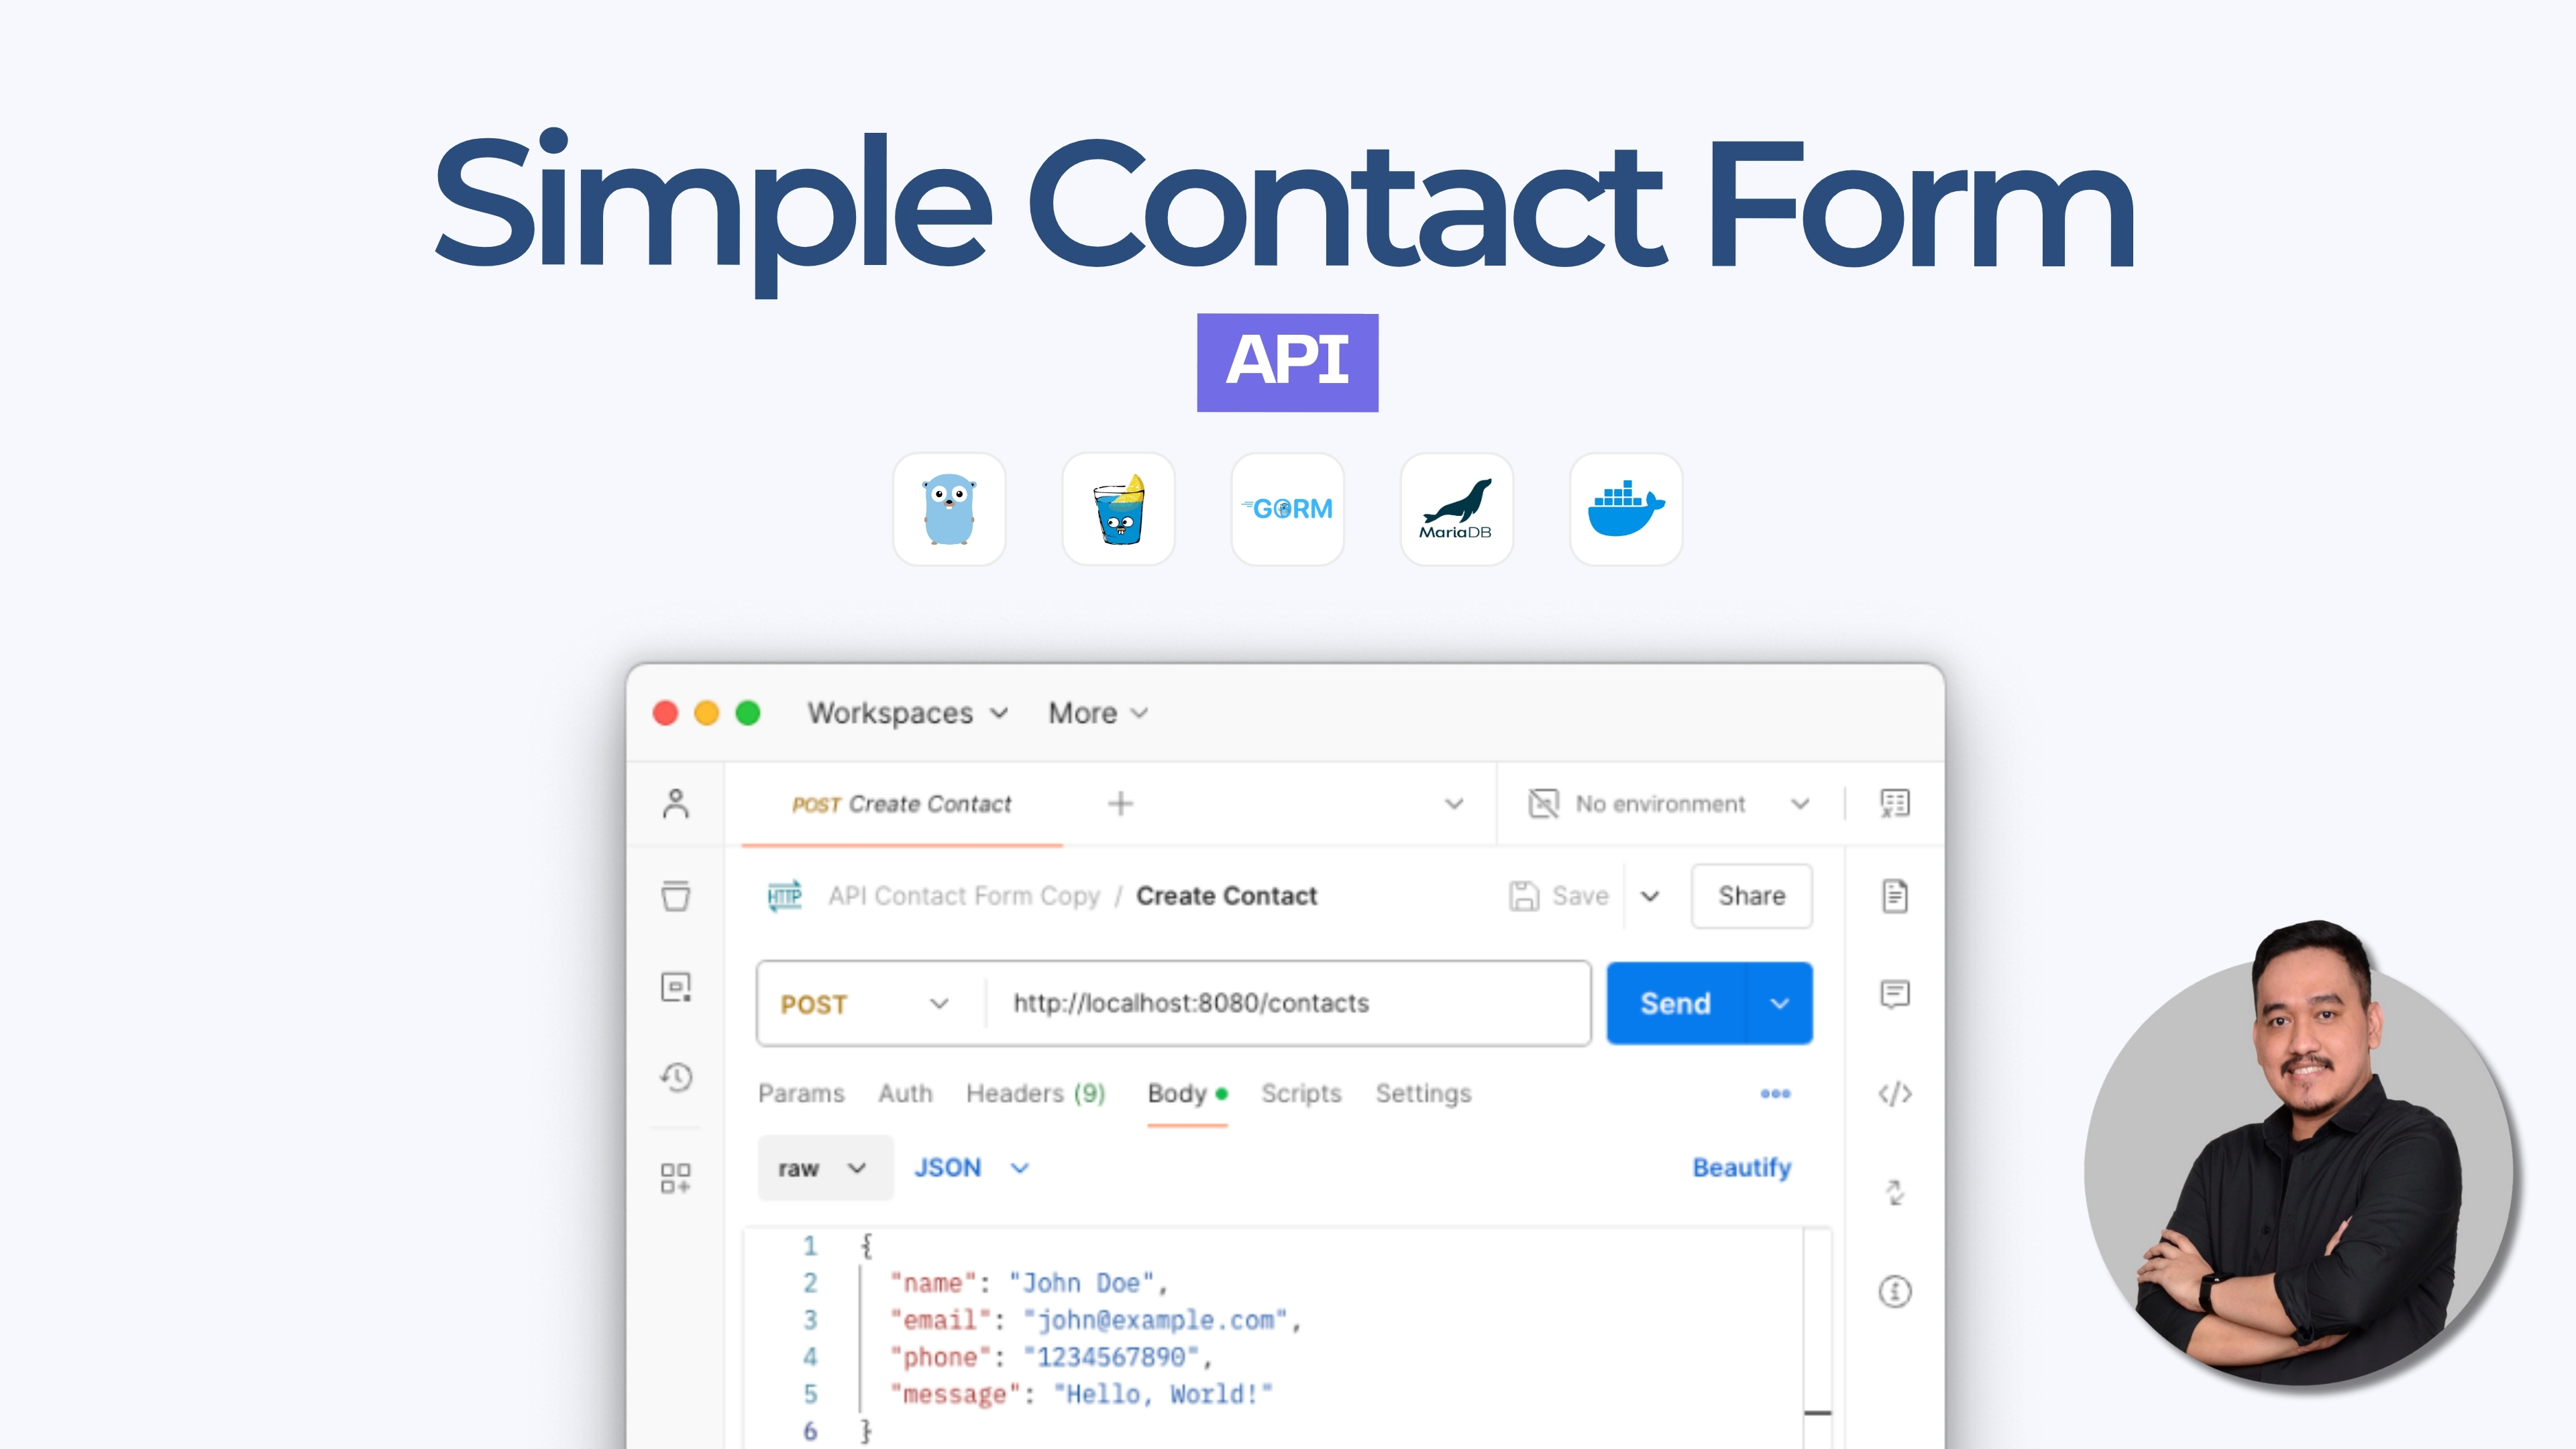
Building a Simple Contact Form API Using Golang, Gin Framework, GORM, MariaDB, and Docker
Introduction
This article has a related root article:
Contact forms play a crucial role in online communication, linking users with service providers effectively. Whether it's for gathering feedback, handling inquiries, or offering support.
In this tutorial, we will demonstrate how to build a simple Contact Form API using Golang, Gin, GORM, and Docker. This technology stack provides excellent performance, scalability, and simplifies both deployment and maintenance.
Project Overview
Our project, named api-contact-form, is a RESTful API that enables users to submit, retrieve, update, and delete contact messages. Leveraging Golang as main codebase, Gin framework, GORM as the ORM for database interactions, and Docker for containerization. This API is designed to be efficient, scalable, and easy to deploy across various environments.
Key Features
- CRUD Operations: Create, Read, Update, and Delete contact messages.
- Structured API Responses: Consistent and standardized responses for all endpoints.
- Dockerized Deployment: Containerized application for consistent deployment across different environments.
- Environment Configuration: Easily manage configurations using environment variables.
Prerequisites
Before getting started, make sure you have the following installed and a basic understanding of each:
- Golang (version 1.20 or later)
- Docker
- Docker Compose
Step 1: Setting Up the Project
1.1. Create the Project Directory:
Begin by creating a new directory for your project and navigating into it.
mkdir api-contact-form
cd api-contact-form
1.2. Initialize the Go Module:
Initialize a new Go module to manage your project's dependencies.
go mod init api-contact-form1.3. Install Necessary Dependencies
Install the required Go packages for building the API. This includes the Gin web framework, GORM for ORM functionalities and other dependencies.
go get -u github.com/gin-gonic/gin
go get -u gorm.io/gorm
go get -u gorm.io/driver/mysql
go get -u github.com/gin-contrib/cors
go get -u github.com/joho/godotenv
Running these commands will update the go.mod and go.sum files with the necessary dependencies.
Or, you can update manually on:
go.modmodule api-contact-form go 1.22.5 require ( filippo.io/edwards25519 v1.1.0 // indirect github.com/bytedance/sonic v1.12.3 // indirect github.com/bytedance/sonic/loader v0.2.0 // indirect github.com/cloudwego/base64x v0.1.4 // indirect github.com/cloudwego/iasm v0.2.0 // indirect github.com/gabriel-vasile/mimetype v1.4.6 // indirect github.com/gin-contrib/cors v1.7.2 // indirect github.com/gin-contrib/sse v0.1.0 // indirect github.com/gin-gonic/gin v1.10.0 // indirect github.com/go-playground/locales v0.14.1 // indirect github.com/go-playground/universal-translator v0.18.1 // indirect github.com/go-playground/validator/v10 v10.22.1 // indirect github.com/go-sql-driver/mysql v1.8.1 // indirect github.com/goccy/go-json v0.10.3 // indirect github.com/jinzhu/inflection v1.0.0 // indirect github.com/jinzhu/now v1.1.5 // indirect github.com/joho/godotenv v1.5.1 // indirect github.com/json-iterator/go v1.1.12 // indirect github.com/klauspost/cpuid/v2 v2.2.8 // indirect github.com/leodido/go-urn v1.4.0 // indirect github.com/mattn/go-isatty v0.0.20 // indirect github.com/modern-go/concurrent v0.0.0-20180306012644-bacd9c7ef1dd // indirect github.com/modern-go/reflect2 v1.0.2 // indirect github.com/pelletier/go-toml/v2 v2.2.3 // indirect github.com/twitchyliquid64/golang-asm v0.15.1 // indirect github.com/ugorji/go/codec v1.2.12 // indirect golang.org/x/arch v0.11.0 // indirect golang.org/x/crypto v0.28.0 // indirect golang.org/x/net v0.30.0 // indirect golang.org/x/sys v0.26.0 // indirect golang.org/x/text v0.19.0 // indirect google.golang.org/protobuf v1.35.1 // indirect gopkg.in/yaml.v3 v3.0.1 // indirect gorm.io/driver/mysql v1.5.7 // indirect gorm.io/gorm v1.25.12 // indirect )
go.sumfilippo.io/edwards25519 v1.1.0 h1:FNf4tywRC1HmFuKW5xopWpigGjJKiJSV0Cqo0cJWDaA= filippo.io/edwards25519 v1.1.0/go.mod h1:BxyFTGdWcka3PhytdK4V28tE5sGfRvvvRV7EaN4VDT4= github.com/bytedance/sonic v1.12.3 h1:W2MGa7RCU1QTeYRTPE3+88mVC0yXmsRQRChiyVocVjU= github.com/bytedance/sonic v1.12.3/go.mod h1:B8Gt/XvtZ3Fqj+iSKMypzymZxw/FVwgIGKzMzT9r/rk= github.com/bytedance/sonic/loader v0.1.1/go.mod h1:ncP89zfokxS5LZrJxl5z0UJcsk4M4yY2JpfqGeCtNLU= github.com/bytedance/sonic/loader v0.2.0 h1:zNprn+lsIP06C/IqCHs3gPQIvnvpKbbxyXQP1iU4kWM= github.com/bytedance/sonic/loader v0.2.0/go.mod h1:ncP89zfokxS5LZrJxl5z0UJcsk4M4yY2JpfqGeCtNLU= github.com/cloudwego/base64x v0.1.4 h1:jwCgWpFanWmN8xoIUHa2rtzmkd5J2plF/dnLS6Xd/0Y= github.com/cloudwego/base64x v0.1.4/go.mod h1:0zlkT4Wn5C6NdauXdJRhSKRlJvmclQ1hhJgA0rcu/8w= github.com/cloudwego/iasm v0.2.0 h1:1KNIy1I1H9hNNFEEH3DVnI4UujN+1zjpuk6gwHLTssg= github.com/cloudwego/iasm v0.2.0/go.mod h1:8rXZaNYT2n95jn+zTI1sDr+IgcD2GVs0nlbbQPiEFhY= github.com/davecgh/go-spew v1.1.0/go.mod h1:J7Y8YcW2NihsgmVo/mv3lAwl/skON4iLHjSsI+c5H38= github.com/davecgh/go-spew v1.1.1/go.mod h1:J7Y8YcW2NihsgmVo/mv3lAwl/skON4iLHjSsI+c5H38= github.com/gabriel-vasile/mimetype v1.4.6 h1:3+PzJTKLkvgjeTbts6msPJt4DixhT4YtFNf1gtGe3zc= github.com/gabriel-vasile/mimetype v1.4.6/go.mod h1:JX1qVKqZd40hUPpAfiNTe0Sne7hdfKSbOqqmkq8GCXc= github.com/gin-contrib/cors v1.7.2 h1:oLDHxdg8W/XDoN/8zamqk/Drgt4oVZDvaV0YmvVICQw= github.com/gin-contrib/cors v1.7.2/go.mod h1:SUJVARKgQ40dmrzgXEVxj2m7Ig1v1qIboQkPDTQ9t2E= github.com/gin-contrib/sse v0.1.0 h1:Y/yl/+YNO8GZSjAhjMsSuLt29uWRFHdHYUb5lYOV9qE= github.com/gin-contrib/sse v0.1.0/go.mod h1:RHrZQHXnP2xjPF+u1gW/2HnVO7nvIa9PG3Gm+fLHvGI= github.com/gin-gonic/gin v1.10.0 h1:nTuyha1TYqgedzytsKYqna+DfLos46nTv2ygFy86HFU= github.com/gin-gonic/gin v1.10.0/go.mod h1:4PMNQiOhvDRa013RKVbsiNwoyezlm2rm0uX/T7kzp5Y= github.com/go-playground/locales v0.14.1 h1:EWaQ/wswjilfKLTECiXz7Rh+3BjFhfDFKv/oXslEjJA= github.com/go-playground/locales v0.14.1/go.mod h1:hxrqLVvrK65+Rwrd5Fc6F2O76J/NuW9t0sjnWqG1slY= github.com/go-playground/universal-translator v0.18.1 h1:Bcnm0ZwsGyWbCzImXv+pAJnYK9S473LQFuzCbDbfSFY= github.com/go-playground/universal-translator v0.18.1/go.mod h1:xekY+UJKNuX9WP91TpwSH2VMlDf28Uj24BCp08ZFTUY= github.com/go-playground/validator/v10 v10.22.1 h1:40JcKH+bBNGFczGuoBYgX4I6m/i27HYW8P9FDk5PbgA= github.com/go-playground/validator/v10 v10.22.1/go.mod h1:dbuPbCMFw/DrkbEynArYaCwl3amGuJotoKCe95atGMM= github.com/go-sql-driver/mysql v1.7.0/go.mod h1:OXbVy3sEdcQ2Doequ6Z5BW6fXNQTmx+9S1MCJN5yJMI= github.com/go-sql-driver/mysql v1.8.1 h1:LedoTUt/eveggdHS9qUFC1EFSa8bU2+1pZjSRpvNJ1Y= github.com/go-sql-driver/mysql v1.8.1/go.mod h1:wEBSXgmK//2ZFJyE+qWnIsVGmvmEKlqwuVSjsCm7DZg= github.com/goccy/go-json v0.10.3 h1:KZ5WoDbxAIgm2HNbYckL0se1fHD6rz5j4ywS6ebzDqA= github.com/goccy/go-json v0.10.3/go.mod h1:oq7eo15ShAhp70Anwd5lgX2pLfOS3QCiwU/PULtXL6M= github.com/google/gofuzz v1.0.0/go.mod h1:dBl0BpW6vV/+mYPU4Po3pmUjxk6FQPldtuIdl/M65Eg= github.com/jinzhu/inflection v1.0.0 h1:K317FqzuhWc8YvSVlFMCCUb36O/S9MCKRDI7QkRKD/E= github.com/jinzhu/inflection v1.0.0/go.mod h1:h+uFLlag+Qp1Va5pdKtLDYj+kHp5pxUVkryuEj+Srlc= github.com/jinzhu/now v1.1.5 h1:/o9tlHleP7gOFmsnYNz3RGnqzefHA47wQpKrrdTIwXQ= github.com/jinzhu/now v1.1.5/go.mod h1:d3SSVoowX0Lcu0IBviAWJpolVfI5UJVZZ7cO71lE/z8= github.com/joho/godotenv v1.5.1 h1:7eLL/+HRGLY0ldzfGMeQkb7vMd0as4CfYvUVzLqw0N0= github.com/joho/godotenv v1.5.1/go.mod h1:f4LDr5Voq0i2e/R5DDNOoa2zzDfwtkZa6DnEwAbqwq4= github.com/json-iterator/go v1.1.12 h1:PV8peI4a0ysnczrg+LtxykD8LfKY9ML6u2jnxaEnrnM= github.com/json-iterator/go v1.1.12/go.mod h1:e30LSqwooZae/UwlEbR2852Gd8hjQvJoHmT4TnhNGBo= github.com/klauspost/cpuid/v2 v2.0.9/go.mod h1:FInQzS24/EEf25PyTYn52gqo7WaD8xa0213Md/qVLRg= github.com/klauspost/cpuid/v2 v2.2.8 h1:+StwCXwm9PdpiEkPyzBXIy+M9KUb4ODm0Zarf1kS5BM= github.com/klauspost/cpuid/v2 v2.2.8/go.mod h1:Lcz8mBdAVJIBVzewtcLocK12l3Y+JytZYpaMropDUws= github.com/knz/go-libedit v1.10.1/go.mod h1:MZTVkCWyz0oBc7JOWP3wNAzd002ZbM/5hgShxwh4x8M= github.com/leodido/go-urn v1.4.0 h1:WT9HwE9SGECu3lg4d/dIA+jxlljEa1/ffXKmRjqdmIQ= github.com/leodido/go-urn v1.4.0/go.mod h1:bvxc+MVxLKB4z00jd1z+Dvzr47oO32F/QSNjSBOlFxI= github.com/mattn/go-isatty v0.0.20 h1:xfD0iDuEKnDkl03q4limB+vH+GxLEtL/jb4xVJSWWEY= github.com/mattn/go-isatty v0.0.20/go.mod h1:W+V8PltTTMOvKvAeJH7IuucS94S2C6jfK/D7dTCTo3Y= github.com/modern-go/concurrent v0.0.0-20180228061459-e0a39a4cb421/go.mod h1:6dJC0mAP4ikYIbvyc7fijjWJddQyLn8Ig3JB5CqoB9Q= github.com/modern-go/concurrent v0.0.0-20180306012644-bacd9c7ef1dd h1:TRLaZ9cD/w8PVh93nsPXa1VrQ6jlwL5oN8l14QlcNfg= github.com/modern-go/concurrent v0.0.0-20180306012644-bacd9c7ef1dd/go.mod h1:6dJC0mAP4ikYIbvyc7fijjWJddQyLn8Ig3JB5CqoB9Q= github.com/modern-go/reflect2 v1.0.2 h1:xBagoLtFs94CBntxluKeaWgTMpvLxC4ur3nMaC9Gz0M= github.com/modern-go/reflect2 v1.0.2/go.mod h1:yWuevngMOJpCy52FWWMvUC8ws7m/LJsjYzDa0/r8luk= github.com/pelletier/go-toml/v2 v2.2.3 h1:YmeHyLY8mFWbdkNWwpr+qIL2bEqT0o95WSdkNHvL12M= github.com/pelletier/go-toml/v2 v2.2.3/go.mod h1:MfCQTFTvCcUyyvvwm1+G6H/jORL20Xlb6rzQu9GuUkc= github.com/pmezard/go-difflib v1.0.0/go.mod h1:iKH77koFhYxTK1pcRnkKkqfTogsbg7gZNVY4sRDYZ/4= github.com/stretchr/objx v0.1.0/go.mod h1:HFkY916IF+rwdDfMAkV7OtwuqBVzrE8GR6GFx+wExME= github.com/stretchr/objx v0.4.0/go.mod h1:YvHI0jy2hoMjB+UWwv71VJQ9isScKT/TqJzVSSt89Yw= github.com/stretchr/objx v0.5.0/go.mod h1:Yh+to48EsGEfYuaHDzXPcE3xhTkx73EhmCGUpEOglKo= github.com/stretchr/testify v1.3.0/go.mod h1:M5WIy9Dh21IEIfnGCwXGc5bZfKNJtfHm1UVUgZn+9EI= github.com/stretchr/testify v1.7.0/go.mod h1:6Fq8oRcR53rry900zMqJjRRixrwX3KX962/h/Wwjteg= github.com/stretchr/testify v1.7.1/go.mod h1:6Fq8oRcR53rry900zMqJjRRixrwX3KX962/h/Wwjteg= github.com/stretchr/testify v1.8.0/go.mod h1:yNjHg4UonilssWZ8iaSj1OCr/vHnekPRkoO+kdMU+MU= github.com/stretchr/testify v1.8.1/go.mod h1:w2LPCIKwWwSfY2zedu0+kehJoqGctiVI29o6fzry7u4= github.com/stretchr/testify v1.9.0/go.mod h1:r2ic/lqez/lEtzL7wO/rwa5dbSLXVDPFyf8C91i36aY= github.com/twitchyliquid64/golang-asm v0.15.1 h1:SU5vSMR7hnwNxj24w34ZyCi/FmDZTkS4MhqMhdFk5YI= github.com/twitchyliquid64/golang-asm v0.15.1/go.mod h1:a1lVb/DtPvCB8fslRZhAngC2+aY1QWCk3Cedj/Gdt08= github.com/ugorji/go/codec v1.2.12 h1:9LC83zGrHhuUA9l16C9AHXAqEV/2wBQ4nkvumAE65EE= github.com/ugorji/go/codec v1.2.12/go.mod h1:UNopzCgEMSXjBc6AOMqYvWC1ktqTAfzJZUZgYf6w6lg= golang.org/x/arch v0.11.0 h1:KXV8WWKCXm6tRpLirl2szsO5j/oOODwZf4hATmGVNs4= golang.org/x/arch v0.11.0/go.mod h1:FEVrYAQjsQXMVJ1nsMoVVXPZg6p2JE2mx8psSWTDQys= golang.org/x/crypto v0.28.0 h1:GBDwsMXVQi34v5CCYUm2jkJvu4cbtru2U4TN2PSyQnw= golang.org/x/crypto v0.28.0/go.mod h1:rmgy+3RHxRZMyY0jjAJShp2zgEdOqj2AO7U0pYmeQ7U= golang.org/x/net v0.30.0 h1:AcW1SDZMkb8IpzCdQUaIq2sP4sZ4zw+55h6ynffypl4= golang.org/x/net v0.30.0/go.mod h1:2wGyMJ5iFasEhkwi13ChkO/t1ECNC4X4eBKkVFyYFlU= golang.org/x/sys v0.5.0/go.mod h1:oPkhp1MJrh7nUepCBck5+mAzfO9JrbApNNgaTdGDITg= golang.org/x/sys v0.6.0/go.mod h1:oPkhp1MJrh7nUepCBck5+mAzfO9JrbApNNgaTdGDITg= golang.org/x/sys v0.26.0 h1:KHjCJyddX0LoSTb3J+vWpupP9p0oznkqVk/IfjymZbo= golang.org/x/sys v0.26.0/go.mod h1:/VUhepiaJMQUp4+oa/7Zr1D23ma6VTLIYjOOTFZPUcA= golang.org/x/text v0.19.0 h1:kTxAhCbGbxhK0IwgSKiMO5awPoDQ0RpfiVYBfK860YM= golang.org/x/text v0.19.0/go.mod h1:BuEKDfySbSR4drPmRPG/7iBdf8hvFMuRexcpahXilzY= google.golang.org/protobuf v1.35.1 h1:m3LfL6/Ca+fqnjnlqQXNpFPABW1UD7mjh8KO2mKFytA= google.golang.org/protobuf v1.35.1/go.mod h1:9fA7Ob0pmnwhb644+1+CVWFRbNajQ6iRojtC/QF5bRE= gopkg.in/check.v1 v0.0.0-20161208181325-20d25e280405/go.mod h1:Co6ibVJAznAaIkqp8huTwlJQCZ016jof/cbN4VW5Yz0= gopkg.in/yaml.v3 v3.0.0-20200313102051-9f266ea9e77c/go.mod h1:K4uyk7z7BCEPqu6E+C64Yfv1cQ7kz7rIZviUmN+EgEM= gopkg.in/yaml.v3 v3.0.1 h1:fxVm/GzAzEWqLHuvctI91KS9hhNmmWOoWu0XTYJS7CA= gopkg.in/yaml.v3 v3.0.1/go.mod h1:K4uyk7z7BCEPqu6E+C64Yfv1cQ7kz7rIZviUmN+EgEM= gorm.io/driver/mysql v1.5.7 h1:MndhOPYOfEp2rHKgkZIhJ16eVUIRf2HmzgoPmh7FCWo= gorm.io/driver/mysql v1.5.7/go.mod h1:sEtPWMiqiN1N1cMXoXmBbd8C6/l+TESwriotuRRpkDM= gorm.io/gorm v1.25.7/go.mod h1:hbnx/Oo0ChWMn1BIhpy1oYozzpM15i4YPuHDmfYtwg8= gorm.io/gorm v1.25.12 h1:I0u8i2hWQItBq1WfE0o2+WuL9+8L21K9e2HHSTE/0f8= gorm.io/gorm v1.25.12/go.mod h1:xh7N7RHfYlNc5EmcI/El95gXusucDrQnHXe0+CgWcLQ= nullprogram.com/x/optparse v1.0.0/go.mod h1:KdyPE+Igbe0jQUrVfMqDMeJQIJZEuyV7pjYmp6pbG50= rsc.io/pdf v0.1.1/go.mod h1:n8OzWcQ6Sp37PL01nO98y4iUCRdTGarVfzxY20ICaU4=
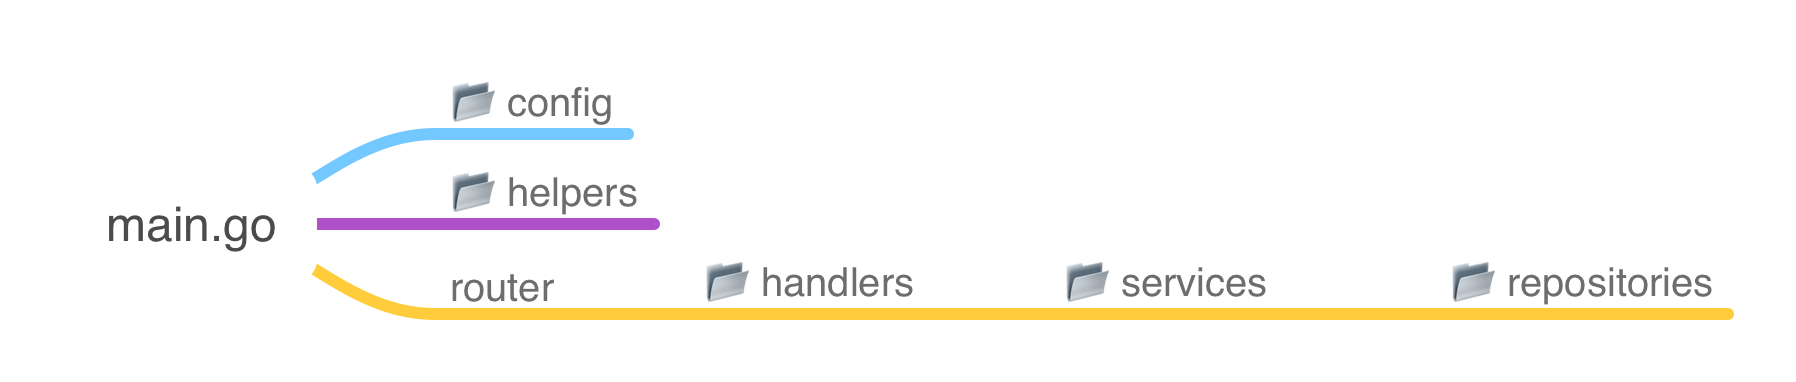
Step 2: Understanding the Directory Structure
A well-organized project structure enhances maintainability and scalability. Here's an overview of the api-contact-form project's file structure:
📂 api-contact-form/
├── 📂 config/
│   ├── 📄 database.go
│   └── 📄 env.go
├── 📂 handlers/
│   ├── 📄 contact_handler.go
│   ├── 📄 health_handler.go
│   └── 📄 main_response.go
├── 📂 helpers/
│   ├── 📄 datetime_helper.go
│   └── 📄 env_helper.go
├── 📂 models/
│   └── 📄 contact.go
├── 📂 repositories/
│   └── 📄 contact_repository.go
├── 📂 requests/
│   └── 📄 contact_request.go
├── 📂 responses/
│   └── 📄 api_response.go
├── 📂 services/
│   └── 📄 contact_service.go
├── 📄 .dockerignore
├── 📄 .env.example
├── 📄 .gitignore
├── 📄 docker-compose.yaml
├── 📄 Dockerfile
├── 📄 go.mod
├── 📄 go.sum
└── 📄 main.go
Codebase structure mapping:
Step 3: Create Configuration Code
Database Configuration
Manages the database connection setup using GORM. This file initializes the connection to the database based on environment configurations.
config/database.go:// Package config handles the initialization and configuration of the database connection. // // It establishes a connection to a MySQL database using GORM, configures the connection pool, // and performs automatic migrations for the Contact model. // // Author: Tri Wicaksono // Website: https://triwicaksono.com package config import ( "fmt" "time" "api-contact-form/models" "gorm.io/driver/mysql" "gorm.io/gorm" "gorm.io/gorm/schema" ) // DB is a global variable that holds the database connection instance. // It is accessible throughout the application for executing database operations. var DB *gorm.DB // InitDB initializes the database connection using environment variables. // It sets up the connection pool and performs automatic migrations for the Contact model. // // The function performs the following steps: // 1. Retrieves database configuration from environment variables. // 2. Constructs the Data Source Name (DSN) for MySQL connection. // 3. Opens the database connection using GORM with a singular table naming strategy. // 4. Configures the connection pool with specified limits. // 5. Automatically migrates the Contact model to create or update the corresponding table. // // If any step fails, the function will panic with an appropriate error message. func InitDB() { // Retrieve database configuration from environment variables with default values. dbUser := GetEnv("DB_USER", "user") dbPassword := GetEnv("DB_PASSWORD", "password") dbHost := GetEnv("DB_HOST", "db") dbPort := GetEnv("DB_PORT", "3306") dbName := GetEnv("DB_NAME", "contactsdb") // Construct the Data Source Name (DSN) for MySQL connection. dsn := fmt.Sprintf("%s:%s@tcp(%s:%s)/%s?charset=utf8mb4&parseTime=True&loc=Local", dbUser, dbPassword, dbHost, dbPort, dbName) var err error // Open the database connection using GORM with a singular table naming strategy. DB, err = gorm.Open(mysql.Open(dsn), &gorm.Config{ NamingStrategy: schema.NamingStrategy{ SingularTable: true, }, }) if err != nil { panic(fmt.Sprintf("Failed to connect to database: %v", err)) } // Configure the connection pool settings. sqlDB, err := DB.DB() if err != nil { panic("Failed to get database instance!") } sqlDB.SetMaxOpenConns(10) // Maximum number of open connections to the database. sqlDB.SetMaxIdleConns(5) // Maximum number of idle connections in the pool. sqlDB.SetConnMaxLifetime(time.Hour) // Maximum amount of time a connection may be reused. // Automatically migrate the Contact model to create or update the corresponding table. if err := DB.AutoMigrate(&models.Contact{}); err != nil { panic(fmt.Sprintf("AutoMigrate failed: %v", err)) } }
Environment Variable
Handles environment variable loading and management. It ensures that the application correctly reads and utilizes configuration settings from the .env file.
config/env.go// Package config provides utilities for managing configuration settings. // // It includes functions to retrieve environment variables with default fallback values, // ensuring that the application can gracefully handle missing or unset environment variables. // // Author: Tri Wicaksono // Website: https://triwicaksono.com package config import "os" // GetEnv retrieves the value of the environment variable named by the key. // If the environment variable is not set or is empty, it returns the provided default value. // // Parameters: // - key: The name of the environment variable to retrieve. // - defaultVal: The default value to return if the environment variable is not set. // // Returns: // - A string containing the value of the environment variable or the default value. func GetEnv(key, defaultVal string) string { // Look up the environment variable by key. if value, exists := os.LookupEnv(key); exists && value != "" { return value } return defaultVal }
Step 4: Setting up .env
Proper configuration is essential for the smooth operation of your application. We'll use environment variables to manage configurations, making it easy to switch settings across different environments (development, staging, production).
Create an .env File
Start by creating a .envfill in the necessary configurations, such as database credentials, API settings, and other environment-specific variables.
# Application Configuration
APP_PORT=8080

# Timezone Configuration
APP_TIMEZONE=Asia/Jakarta

# CORS Configuration
CORS_ALLOWED_ORIGINS=http://localhost:8081,http://localhost:8082,http://cms-contact-form:8081,http://client-contact-form:8082
CORS_ALLOWED_METHODS=GET,POST,PUT,DELETE,OPTIONS
CORS_ALLOWED_HEADERS=Origin,Content-Type,Accept,Authorization
CORS_ALLOW_CREDENTIALS=true
CORS_EXPOSE_HEADERS=Content-Length,Content-Type

# Database Configuration
DB_HOST=mariadb-contact-form
DB_PORT=3306
DB_USER=user
DB_PASSWORD=password
DB_NAME=contactsdb

##
## THIS CONFIG FOR DOCKER-COMPOSE.YAML ONLY, NOT FOR THE APP
##
# Database Configuration
MYSQL_ROOT_PASSWORD=rootpassword
MYSQL_DATABASE=contactsdb
MYSQL_USER=user
MYSQL_PASSWORD=password

# Port Mapping Configuration
HOST_MARIADB_PORT=3306
CONT_MARIADB_PORT=3306

HOST_PHPMYADMIN_PORT=8011
CONT_PHPMYADMIN_PORT=80

HOST_API_PORT=8080
CONT_API_PORT=8080
Secure the .env File:
Ensure that the .env file is not committed to version control by verifying that it's listed in .gitignore.
# Environment variables
.env

# OS generated files
.DS_Store
Thumbs.db

# app build result
api-contact-form
Step 5: Implementing the Handlers
Handlers are responsible for processing incoming HTTP requests, interacting with services, and returning appropriate responses.
Contact Handler
Manages endpoints related to contact operations, such as creating, retrieving, updating, and deleting contacts.
handlers/contact_handler.go// Package handlers contains the HTTP handler implementations for managing contacts. // // It defines the ContactHandler struct, which provides methods to handle // CRUD (Create, Read, Update, Delete) operations for contact entities. // // Author: Tri Wicaksono // Website: https://triwicaksono.com package handlers import ( "api-contact-form/requests" "api-contact-form/responses" "api-contact-form/services" "net/http" "strconv" "github.com/gin-gonic/gin" ) // ContactHandler handles HTTP requests related to contact operations. type ContactHandler struct { service services.ContactService } // NewContactHandler creates a new instance of ContactHandler with the provided ContactService. func NewContactHandler(service services.ContactService) *ContactHandler { return &ContactHandler{service} } // CreateContact handles the creation of a new contact. // // It expects a JSON payload matching the ContactRequest structure. // Upon successful creation, it returns the created contact with a 201 status code. // If there's an error in binding the request or creating the contact, it returns an appropriate error response. func (h *ContactHandler) CreateContact(c *gin.Context) { var req requests.ContactRequest // Bind the JSON payload to the ContactRequest struct. if err := c.ShouldBindJSON(&req); err != nil { c.JSON(http.StatusBadRequest, responses.APIResponse{ Code: "BAD_REQUEST", Message: err.Error(), Data: nil, }) return } // Use the service layer to create a new contact. contact, err := h.service.CreateContact(&req) if err != nil { c.JSON(http.StatusInternalServerError, responses.APIResponse{ Code: "INTERNAL_SERVER_ERROR", Message: err.Error(), Data: nil, }) return } // Respond with the created contact and a success message. c.JSON(http.StatusCreated, responses.APIResponse{ Code: "CREATED", Message: "Contact created successfully", Data: responses.ContactResponseFromModel(contact), }) } // GetContacts retrieves all contacts. // // It interacts with the service layer to fetch all contact records. // On success, it returns the list of contacts with a 200 status code. // In case of an error, it responds with a 500 status code and an error message. func (h *ContactHandler) GetContacts(c *gin.Context) { // Fetch all contacts using the service layer. contacts, err := h.service.GetAllContacts() if err != nil { c.JSON(http.StatusInternalServerError, responses.APIResponse{ Code: "INTERNAL_SERVER_ERROR", Message: err.Error(), Data: nil, }) return } // Convert the contact models to response formats. var contactResponses []responses.ContactResponse for _, contact := range contacts { contactResponses = append(contactResponses, responses.ContactResponseFromModel(&contact)) } // Respond with the list of contacts. c.JSON(http.StatusOK, responses.APIResponse{ Code: "SUCCESS", Message: "Contacts retrieved successfully", Data: contactResponses, }) } // GetContact retrieves a single contact by its ID. // // It expects the contact ID as a URL parameter. // If the ID is invalid or the contact does not exist, it returns an appropriate error response. // On success, it returns the contact details with a 200 status code. func (h *ContactHandler) GetContact(c *gin.Context) { // Retrieve the 'id' parameter from the URL. idParam := c.Param("id") id, err := strconv.Atoi(idParam) if err != nil { c.JSON(http.StatusBadRequest, responses.APIResponse{ Code: "BAD_REQUEST", Message: "Invalid ID", Data: nil, }) return } // Fetch the contact by ID using the service layer. contact, err := h.service.GetContactByID(uint(id)) if err != nil { c.JSON(http.StatusNotFound, responses.APIResponse{ Code: "NOT_FOUND", Message: "Contact not found", Data: nil, }) return } // Respond with the contact details. c.JSON(http.StatusOK, responses.APIResponse{ Code: "SUCCESS", Message: "Contact retrieved successfully", Data: responses.ContactResponseFromModel(contact), }) } // UpdateContact updates an existing contact by its ID. // // It expects the contact ID as a URL parameter and a JSON payload matching the ContactRequest structure. // If the ID is invalid or the contact does not exist, it returns an appropriate error response. // On successful update, it returns the updated contact with a 200 status code. func (h *ContactHandler) UpdateContact(c *gin.Context) { // Retrieve the 'id' parameter from the URL. idParam := c.Param("id") id, err := strconv.Atoi(idParam) if err != nil { c.JSON(http.StatusBadRequest, responses.APIResponse{ Code: "BAD_REQUEST", Message: "Invalid ID", Data: nil, }) return } var req requests.ContactRequest // Bind the JSON payload to the ContactRequest struct. if err := c.ShouldBindJSON(&req); err != nil { c.JSON(http.StatusBadRequest, responses.APIResponse{ Code: "BAD_REQUEST", Message: err.Error(), Data: nil, }) return } // Use the service layer to update the contact. contact, err := h.service.UpdateContact(uint(id), &req) if err != nil { c.JSON(http.StatusInternalServerError, responses.APIResponse{ Code: "INTERNAL_SERVER_ERROR", Message: err.Error(), Data: nil, }) return } // Respond with the updated contact and a success message. c.JSON(http.StatusOK, responses.APIResponse{ Code: "SUCCESS", Message: "Contact updated successfully", Data: responses.ContactResponseFromModel(contact), }) } // DeleteContact removes a contact by its ID. // // It expects the contact ID as a URL parameter. // If the ID is invalid or the contact does not exist, it returns an appropriate error response. // On successful deletion, it returns a success message with a 200 status code. func (h *ContactHandler) DeleteContact(c *gin.Context) { // Retrieve the 'id' parameter from the URL. idParam := c.Param("id") id, err := strconv.Atoi(idParam) if err != nil { c.JSON(http.StatusBadRequest, responses.APIResponse{ Code: "BAD_REQUEST", Message: "Invalid ID", Data: nil, }) return } // Use the service layer to delete the contact. err = h.service.DeleteContact(uint(id)) if err != nil { c.JSON(http.StatusInternalServerError, responses.APIResponse{ Code: "INTERNAL_SERVER_ERROR", Message: err.Error(), Data: nil, }) return } // Respond with a success message. c.JSON(http.StatusOK, responses.APIResponse{ Code: "SUCCESS", Message: "Contact deleted successfully", Data: nil, }) }
Health Handler
Provides a simple health check endpoint to verify if the API is running correctly.
handlers/health_handler.go// Package handlers contains the HTTP handler implementations for various endpoints. // // Specifically, the HealthHandler provides a health check endpoint to verify // that the API is running correctly. // // Author: Tri Wicaksono // Website: https://triwicaksono.com package handlers import ( "api-contact-form/responses" "net/http" "github.com/gin-gonic/gin" ) // HealthHandler handles HTTP requests related to health checks. type HealthHandler struct{} // NewHealthHandler creates a new instance of HealthHandler. func NewHealthHandler() *HealthHandler { return &HealthHandler{} } // HealthCheck responds with a simple message indicating that the API is running. // // It returns a JSON response with a 200 OK status code and a message // confirming the operational status of the API. // // Example Response: // // { // "code": "SUCCESS", // "message": "API is running." // } func (h *HealthHandler) HealthCheck(c *gin.Context) { c.JSON(http.StatusOK, responses.APIResponse{ Code: "SUCCESS", Message: "API is running.", }) }
Main Handler
Provides default API response if the API is running.
handlers/main_handler.go// Package handlers contains the HTTP handler implementations for various endpoints. // // Specifically, the MainHandler provides the root endpoint to verify // that the API Contact Form is running correctly. // // Author: Tri Wicaksono // Website: https://triwicaksono.com package handlers import ( "api-contact-form/responses" "net/http" "github.com/gin-gonic/gin" ) // MainHandler handles HTTP requests for the main/root endpoint. type MainHandler struct{} // NewMainHandler creates a new instance of MainHandler. func NewMainHandler() *MainHandler { return &MainHandler{} } // MainHandler responds with a message indicating that the API Contact Form is running. // // It returns a JSON response with a 200 OK status code and a success message. // // Example Response: // // { // "code": "SUCCESS", // "message": "API Contact Form is running." // } func (h *MainHandler) MainHandler(c *gin.Context) { c.JSON(http.StatusOK, responses.APIResponse{ Code: "SUCCESS", Message: "API Contact Form is running.", }) }
Step 6: Defining Models and Repositories
Models represent the data structures, while repositories handle data persistence and retrieval.
Contact Model
Defines the Contact struct, representing a contact message with fields like ID, Name, Email, Phone, Message, DeletedAt, CreatedAt, and UpdatedAt. This model maps to the database table and includes GORM tags for ORM functionalities, including soft deletes.
models/contact.go// Package models defines the data models for the API Contact Form application. // // It includes the Contact struct, which represents a contact message submitted // through the API. The struct is configured for use with GORM, an ORM library // for Go, to handle database interactions. // // Author: Tri Wicaksono // Website: https://triwicaksono.com package models import ( "time" ) // Contact represents a contact message submitted through the API. type Contact struct { // ID is the unique identifier for each contact message. ID uint `gorm:"primaryKey;column:id;type:BIGINT UNSIGNED AUTO_INCREMENT"` // FullName is the name of the person submitting the contact message. FullName string `gorm:"column:full_name;type:VARCHAR(100);not null"` // Email is the email address of the person submitting the contact message. Email string `gorm:"column:email_address;type:VARCHAR(100);not null"` // Phone is the phone number of the person submitting the contact message. Phone string `gorm:"column:phone_number;type:VARCHAR(20);not null"` // Message is the content of the contact message. Message string `gorm:"column:message_text;type:TEXT;not null"` // CreatedAt records the timestamp when the contact message was created. CreatedAt time.Time `gorm:"column:created_at;type:DATETIME;autoCreateTime"` // UpdatedAt records the timestamp when the contact message was last updated. UpdatedAt time.Time `gorm:"column:updated_at;type:DATETIME;autoUpdateTime"` // DeletedAt records the timestamp when the contact message was deleted. // This field is indexed to optimize deletion queries. DeletedAt time.Time `gorm:"column:deleted_at;type:DATETIME;index"` } // TableName specifies the table name for the Contact model in the database. func (Contact) TableName() string { return "contact_messages" }
Contact Repository
Implements the repository pattern, providing methods to interact with the database for CRUD operations related to contacts. This abstraction allows the service layer to interact with the data layer without worrying about the underlying database logic.
repositories/contact_repository.go// Package repositories provides implementations for data persistence and retrieval // related to contact entities in the API Contact Form application. // // It defines the ContactRepository interface and its GORM-based implementation // for performing CRUD operations on contact records in the database. // // Author: Tri Wicaksono // Website: https://triwicaksono.com package repositories import ( "api-contact-form/models" "time" "gorm.io/gorm" ) // ContactRepository defines the interface for contact data operations. type ContactRepository interface { // Create adds a new contact to the database. Create(contact *models.Contact) error // FindAll retrieves all non-deleted contacts from the database. FindAll() ([]models.Contact, error) // FindByID retrieves a contact by its ID, ensuring it is not deleted. FindByID(id uint) (*models.Contact, error) // Update modifies an existing contact in the database. Update(contact *models.Contact) error // Delete marks a contact as deleted in the database. Delete(contact *models.Contact) error } // contactRepository is the GORM-based implementation of ContactRepository. type contactRepository struct { db *gorm.DB } // NewContactRepository creates a new instance of ContactRepository with the provided GORM DB. func NewContactRepository(db *gorm.DB) ContactRepository { return &contactRepository{db} } // Create adds a new contact to the database. // It returns an error if the operation fails. func (r *contactRepository) Create(contact *models.Contact) error { return r.db.Create(contact).Error } // FindAll retrieves all non-deleted contacts from the database. // It returns a slice of contacts and an error if the operation fails. func (r *contactRepository) FindAll() ([]models.Contact, error) { var contacts []models.Contact err := r.db.Where("deleted_at = ?", "0000-00-00 00:00:00").Find(&contacts).Error return contacts, err } // FindByID retrieves a contact by its ID, ensuring it is not deleted. // It returns the contact and an error if the contact is not found or the operation fails. func (r *contactRepository) FindByID(id uint) (*models.Contact, error) { var contact models.Contact err := r.db.Where("id = ? AND deleted_at = ?", id, "0000-00-00 00:00:00").First(&contact).Error return &contact, err } // Update modifies an existing contact in the database. // It returns an error if the operation fails. func (r *contactRepository) Update(contact *models.Contact) error { return r.db.Save(contact).Error } // Delete marks a contact as deleted in the database by setting the DeletedAt field. // It returns an error if the operation fails. func (r *contactRepository) Delete(contact *models.Contact) error { contact.DeletedAt = time.Now() return r.db.Save(contact).Error }
Step 7: Setting Up Services
Services contain the business logic, acting as an intermediary between handlers and repositories.
Contact Service
Provides methods to manage contacts, such as retrieving all contacts, fetching a contact by ID, creating a new contact, updating existing contacts, and deleting contacts.
services/contact_service.go// Package services provides business logic implementations for contact-related operations // in the API Contact Form application. // // It defines the ContactService interface and its implementation, which handle the creation, // retrieval, updating, and deletion of contact records by interacting with the ContactRepository. // // Author: Tri Wicaksono // Website: https://triwicaksono.com package services import ( "api-contact-form/models" "api-contact-form/repositories" "api-contact-form/requests" "github.com/go-playground/validator/v10" ) // ContactService defines the business logic interface for contact operations. type ContactService interface { // CreateContact creates a new contact based on the provided request. CreateContact(req *requests.ContactRequest) (*models.Contact, error) // GetAllContacts retrieves all non-deleted contacts. GetAllContacts() ([]models.Contact, error) // GetContactByID retrieves a single contact by its ID. GetContactByID(id uint) (*models.Contact, error) // UpdateContact updates an existing contact identified by its ID. UpdateContact(id uint, req *requests.ContactRequest) (*models.Contact, error) // DeleteContact marks a contact as deleted based on its ID. DeleteContact(id uint) error } // contactService is the concrete implementation of ContactService. // It interacts with the ContactRepository to perform data operations and uses // a validator to ensure request data integrity. type contactService struct { repository repositories.ContactRepository validate *validator.Validate } // NewContactService creates a new instance of ContactService with the provided ContactRepository. // It initializes the validator for request validation. func NewContactService(repository repositories.ContactRepository) ContactService { return &contactService{ repository: repository, validate: validator.New(), } } // CreateContact creates a new contact based on the provided ContactRequest. // It validates the request, maps it to the Contact model, and persists it using the repository. // Returns the created Contact and any error encountered. func (s *contactService) CreateContact(req *requests.ContactRequest) (*models.Contact, error) { // Validate input if err := s.validate.Struct(req); err != nil { return nil, err } // Map request to Contact model contact := models.Contact{ FullName: req.Name, Email: req.Email, Phone: req.Phone, Message: req.Message, } // Persist the contact using the repository err := s.repository.Create(&contact) return &contact, err } // GetAllContacts retrieves all non-deleted contacts from the repository. // Returns a slice of Contact models and any error encountered. func (s *contactService) GetAllContacts() ([]models.Contact, error) { return s.repository.FindAll() } // GetContactByID retrieves a single contact by its ID. // Returns the Contact model and any error encountered if the contact is not found. func (s *contactService) GetContactByID(id uint) (*models.Contact, error) { return s.repository.FindByID(id) } // UpdateContact updates an existing contact identified by its ID based on the provided ContactRequest. // It validates the request, retrieves the existing contact, updates its fields, and persists the changes. // Returns the updated Contact and any error encountered. func (s *contactService) UpdateContact(id uint, req *requests.ContactRequest) (*models.Contact, error) { // Validate input if err := s.validate.Struct(req); err != nil { return nil, err } // Retrieve the existing contact contact, err := s.repository.FindByID(id) if err != nil { return nil, err } // Update contact fields contact.FullName = req.Name contact.Email = req.Email contact.Phone = req.Phone contact.Message = req.Message // Persist the updated contact using the repository err = s.repository.Update(contact) return contact, err } // DeleteContact marks a contact as deleted based on its ID. // It retrieves the contact and sets its DeletedAt field to the current time. // Returns any error encountered during the operation. func (s *contactService) DeleteContact(id uint) error { // Retrieve the contact to be deleted contact, err := s.repository.FindByID(id) if err != nil { return err } // Mark the contact as deleted return s.repository.Delete(contact) }
Step 8: Creating Requests and Responses
To ensure proper data validation and consistent API responses, we'll define request and response structures.
Contact Request
Defines the structure of incoming request payloads for contact-related operations, ensuring that data is validated before processing.
requests/contact_request.go// Package requests defines the request payload structures for the API Contact Form application. // // It includes the ContactRequest struct, which represents the data required to create or update // a contact message through the API. // // Author: Tri Wicaksono // Website: https://triwicaksono.com package requests // ContactRequest represents the payload for creating or updating a contact message. type ContactRequest struct { // Name is the full name of the person submitting the contact message. // It is a required field with a maximum length of 100 characters. Name string `json:"name" binding:"required,max=100"` // Email is the email address of the person submitting the contact message. // It is a required field with a maximum length of 100 characters and must follow a valid email format. Email string `json:"email" binding:"required,email,max=100"` // Phone is the phone number of the person submitting the contact message. // It is a required field with a maximum length of 20 characters. Phone string `json:"phone" binding:"required,max=20"` // Message is the content of the contact message. // It is a required field. Message string `json:"message" binding:"required"` }
API Response
Structures the API's response format, encapsulating status codes, messages, and data payloads for uniformity across all endpoints.
responses/api_response.go// Package responses defines the response payload structures for the API Contact Form application. // // It includes the APIResponse struct for standard API responses and the ContactResponse struct // for representing contact data in responses. Additionally, it provides helper functions // to convert models to response formats. // // Author: Tri Wicaksono // Website: https://triwicaksono.com package responses import ( "api-contact-form/helpers" "api-contact-form/models" ) // APIResponse represents the standard structure for API responses. type APIResponse struct { // Code is a string representing the status code of the response. Code string `json:"code"` // Message provides a human-readable message about the response. Message string `json:"message"` // Data holds the payload of the response, which can be any type. Data interface{} `json:"data"` } // ContactResponse represents the structure of a contact in API responses. type ContactResponse struct { // ID is the unique identifier of the contact. ID uint `json:"id"` // Name is the full name of the contact. Name string `json:"name"` // Email is the email address of the contact. Email string `json:"email"` // Phone is the phone number of the contact. Phone string `json:"phone"` // Message is the message content provided by the contact. Message string `json:"message"` // CreatedAt is the timestamp when the contact was created, formatted as a human-readable string. CreatedAt string `json:"created_at"` // UpdatedAt is the timestamp when the contact was last updated, formatted as a human-readable string. UpdatedAt string `json:"updated_at"` } // ContactResponseFromModel converts a Contact model to a ContactResponse. // // Parameters: // - contact: A pointer to the Contact model to be converted. // // Returns: // - A ContactResponse struct populated with data from the Contact model. func ContactResponseFromModel(contact *models.Contact) ContactResponse { return ContactResponse{ ID: contact.ID, Name: contact.FullName, Email: contact.Email, Phone: contact.Phone, Message: contact.Message, CreatedAt: helpers.FormatTimeHuman(contact.CreatedAt), UpdatedAt: helpers.FormatTimeHuman(contact.UpdatedAt), } }
Step 9: Configuring Helpers
Helper functions streamline repetitive tasks, such as environment variable retrieval and date-time formatting.
DateTime Helpers
Contains functions for handling date and time operations, ensuring that timestamps are consistently formatted across the API.
helpers/datetime_helper.go// helpers/helpers.go // Package helpers provides utility functions for the API Contact Form application. // // It includes functions for time formatting and timezone management based on // environment configurations. // // Author: Tri Wicaksono // Website: https://triwicaksono.com package helpers import ( "api-contact-form/config" "log" "time" ) var ( // appTimezone holds the application's configured timezone. appTimezone *time.Location ) // init initializes the application's timezone based on the environment variable. // It loads the timezone location and logs a fatal error if the timezone is invalid. func init() { timezoneStr := config.GetEnv("APP_TIMEZONE", "Asia/Jakarta") var err error appTimezone, err = time.LoadLocation(timezoneStr) if err != nil { log.Fatalf("Failed to load timezone '%s': %v", timezoneStr, err) } } // FormatTimeHuman converts a time.Time object to a human-readable string // in the configured timezone. // // Parameters: // - t: The time.Time object to format. // // Returns: // - A string representing the formatted time. func FormatTimeHuman(t time.Time) string { return t.In(appTimezone).Format("2006-01-02 15:04:05") }
Environment Helpers
Provides utility functions to retrieve environment variables with default values, simplifying configuration management.
helpers/env_helper.go// helpers/helpers.go // Package helpers provides utility functions for the API Contact Form application. // // It includes functions for parsing environment variables and handling configuration-related tasks. // // Author: Tri Wicaksono // Website: https://triwicaksono.com package helpers import ( "log" "os" "strconv" "strings" ) // ParseEnvList parses a comma-separated environment variable into a slice of strings. // It trims any whitespace around the elements. // // Parameters: // - key: The name of the environment variable to parse. // // Returns: // - A slice of strings containing the parsed values, or an empty slice if the variable is not set or empty. func ParseEnvList(key string) []string { val, exists := os.LookupEnv(key) if !exists || val == "" { return []string{} } parts := strings.Split(val, ",") for i := range parts { parts[i] = strings.TrimSpace(parts[i]) } return parts } // GetEnvBool retrieves a boolean environment variable. // It returns the defaultValue if the environment variable is not set or cannot be parsed. // // Parameters: // - key: The name of the environment variable to retrieve. // - defaultValue: The default boolean value to return if the variable is not set or invalid. // // Returns: // - A boolean value representing the environment variable's value or the default value. func GetEnvBool(key string, defaultValue bool) bool { val, exists := os.LookupEnv(key) if !exists || val == "" { return defaultValue } parsedVal, err := strconv.ParseBool(strings.ToLower(val)) if err != nil { log.Printf("Warning: Could not parse boolean value for %s: %v. Using default: %v", key, err, defaultValue) return defaultValue } return parsedVal }
Step 10: Writing main.go
The main.go file serves as the entry point of the application. It initializes configurations, sets up routes, and starts the server.
main.go// Package main serves as the entry point for the API Contact Form application. // // It initializes the necessary configurations, sets up the database connection, // configures repositories, services, and handlers, and starts the HTTP server // using the Gin framework. // // Author: Tri Wicaksono // Website: https://triwicaksono.com package main import ( "api-contact-form/config" "api-contact-form/handlers" "api-contact-form/helpers" "api-contact-form/repositories" "api-contact-form/services" "log" "github.com/gin-contrib/cors" "github.com/gin-gonic/gin" "github.com/joho/godotenv" ) // main is the entry point of the application. // It performs the following steps: // 1. Loads environment variables from the .env file. // 2. Initializes the database connection. // 3. Sets up repositories, services, and handlers. // 4. Configures the Gin router with necessary middleware and routes. // 5. Starts the HTTP server on the specified port. func main() { // Load environment variables from the .env file. err := godotenv.Load() if err != nil { log.Println("Error loading .env file") } // Initialize the database connection. config.InitDB() // Initialize repositories, services, and handlers. mainHandler := handlers.NewMainHandler() healthHandler := handlers.NewHealthHandler() contactRepository := repositories.NewContactRepository(config.DB) contactService := services.NewContactService(contactRepository) contactHandler := handlers.NewContactHandler(contactService) // Create a new Gin router with default middleware (logger and recovery). router := gin.Default() // Configure CORS (Cross-Origin Resource Sharing) settings. corsConfig := cors.Config{ AllowOrigins: helpers.ParseEnvList("CORS_ALLOWED_ORIGINS"), AllowMethods: helpers.ParseEnvList("CORS_ALLOWED_METHODS"), AllowHeaders: helpers.ParseEnvList("CORS_ALLOWED_HEADERS"), AllowCredentials: helpers.GetEnvBool("CORS_ALLOW_CREDENTIALS", false), ExposeHeaders: helpers.ParseEnvList("CORS_EXPOSE_HEADERS"), MaxAge: 12 * 60 * 60, // 12 hours } // Apply the CORS middleware to the router. router.Use(cors.New(corsConfig)) // Define application routes and associate them with their respective handlers. router.GET("/", mainHandler.MainHandler) router.GET("/health", healthHandler.HealthCheck) router.GET("/contacts", contactHandler.GetContacts) router.GET("/contacts/:id", contactHandler.GetContact) router.POST("/contacts", contactHandler.CreateContact) router.PUT("/contacts/:id", contactHandler.UpdateContact) router.DELETE("/contacts/:id", contactHandler.DeleteContact) // Retrieve the application port from environment variables with a default value of "8080". appPort := config.GetEnv("APP_PORT", "8080") // Start the HTTP server on the specified port. if err := router.Run(":" + appPort); err != nil { log.Fatalf("Failed to run the server: %v", err) } }- Initialize Environment Variables:
Load environment variables from the
.envfile to configure the application settings and database connections.
- Establish Database Connection:
Utilize the configurations to connect to the MySQL database using GORM. This involves setting up the connection string and handling any connection errors.
- Auto-Migrate Models:
Automatically migrate the
Contactmodel to the database, ensuring that the database schema aligns with the model definitions.
- Set Up Repositories, Services, and Handlers:
Initialize the repository layer to handle data interactions, the service layer for business logic, and the handler layer to manage HTTP requests and responses.
- Configure Routes:
Define the API endpoints and associate them with their respective handler functions. This includes routes for creating, retrieving, updating, and deleting contacts, as well as a health check endpoint.
- Start the Server:
Launch the Gin HTTP server on the specified port, making the API accessible to clients.
- Initialize Environment Variables:
Step 11: Build and Run Application
Before containerizing the application with Docker, it’s important to build and run it locally to ensure everything works as expected.
Installing Dependencies
Ensure that all necessary Go dependencies are installed. Run the following command to download the dependencies specified in go.mod:
go mod tidyThis command updates the go.sum file with the checksums of the dependencies.
Building the Application
Compile the Go application by running
# this will generate binary file with filename following folder project name (api-contact-form)
go build

or

# if you want ot create binary with custom filename you can use -o parameter
go build -o api-contact-form .
This command builds the application and outputs an executable named main.
Running the Application
Start the application locally using:
./api-contact-form
Confirm that MariaDB is up and running, ensure all required databases have been created, and check that your environment settings properly support database connections.
Step 12: Testing the API
With the application running inside Docker containers, you can now test the API endpoints using tools like Postman, cURL, or Insomnia.
Health Check
Verify that the API is operational.
curl --location 'http://localhost:8080/health'Expected Response:
{
    "code": "SUCCESS",
    "message": "API is running.",
    "data": null
}
Create Contact
Submit a new contact message.
curl --location 'http://localhost:8080/contacts' \
--header 'Content-Type: application/json' \
--data-raw '{
  "name": "John Doe",
  "email": "john@example.com",
  "phone": "1234567890",
  "message": "Hello, World!"
}'
Expected Response:
{
    "code": "CREATED",
    "message": "Contact created successfully",
    "data": {
        "id": 1,
        "name": "John Doe",
        "email": "john@example.com",
        "phone": "1234567890",
        "message": "Hello, World!",
        "created_at": "2024-10-28 17:09:13",
        "updated_at": "2024-10-28 17:09:13"
    }
}
Get All Contacts
Fetch all submitted contacts.
curl --location 'http://localhost:8080/contacts/'Expected Response:
{
    "code": "SUCCESS",
    "message": "Contacts retrieved successfully",
    "data": [
        {
            "id": 1,
            "name": "John Doe",
            "email": "john@example.com",
            "phone": "1234567890",
            "message": "Hello, World!",
            "created_at": "2024-10-28 17:09:13",
            "updated_at": "2024-10-28 17:09:13"
        }
    ]
}
Get Detail Contact
Show contact details.
curl --location 'http://localhost:8080/contacts/1'Expected Response:
{
    "code": "SUCCESS",
    "message": "Contact retrieved successfully",
    "data": {
        "id": 4,
        "name": "John Doe",
        "email": "john@example.com",
        "phone": "1234567890",
        "message": "Hello, World!",
        "created_at": "2024-10-28 17:09:13",
        "updated_at": "2024-10-28 17:09:13"
    }
}
Update Contact
Modify an existing contact's details.
curl --location --request PUT 'http://localhost:8080/contacts/1' \
--header 'Content-Type: application/json' \
--data-raw '{
  "name": "Jane Doe",
  "email": "jane@example.com",
  "phone": "0987654321",
  "message": "Updated Message"
}'
Expected Response:
{
    "code": "SUCCESS",
    "message": "Contact updated successfully",
    "data": {
        "id": 1,
        "name": "Jane Doe",
        "email": "jane@example.com",
        "phone": "0987654321",
        "message": "Updated Message",
        "created_at": "2024-10-24 10:57:08",
        "updated_at": "2024-10-28 17:10:13"
    }
}
Delete Contact
Perform a soft delete on a contact.
curl --location --request DELETE 'http://localhost:8080/contacts/1'Expected Response:
{
    "code": "SUCCESS",
    "message": "Contact deleted successfully",
    "data": null
}
Note: The contact is soft-deleted, meaning it's marked as deleted in the database but not permanently removed.
Step 13: Dockerizing the Application
Containerizing your application ensures consistency across different environments and simplifies deployment.
Dockerfile
Contains instructions to build the Docker image for the Contact Form API. It typically includes steps like setting the base image, installing dependencies, copying source code, building the application, and specifying the command to run the application.
Dockerfile# Stage 1: Build the application FROM golang:1.22-alpine AS builder # Set environment variables ENV GO111MODULE=on \ CGO_ENABLED=0 \ GOOS=linux \ GOARCH=amd64 # Set working directory WORKDIR /app # Copy the source code COPY . . # Download dependencies RUN go mod download # Build the application RUN go build -o api-contact-form . # Stage 2: Create the production image FROM alpine:latest # Install tzdata for timezone support RUN apk add --no-cache tzdata # Set the timezone environment variable (can be overridden by .env) ENV TZ=Asia/Jakarta # Configure the timezone RUN ln -sf /usr/share/zoneinfo/$TZ /etc/localtime && echo $TZ > /etc/timezone # Set working directory WORKDIR /app # Create user and group for application # # Create a group with GID 1001 RUN addgroup -g 1001 binarygroup # Create a user with UID 1001 and assign them to the 'binarygroup' group RUN adduser -D -u 1001 -G binarygroup userapp # Copy the binary from the builder stage COPY --from=builder --chown=userapp:binarygroup /app/api-contact-form . # Switch to the userapp user USER userapp # Expose port 8080 EXPOSE 8080 # Command to run the application CMD ["./api-contact-form"]
.dockerignore
Specifies files and directories to exclude from the Docker build context, optimizing build performance and enhancing security by preventing unnecessary or sensitive files from being included in the Docker image.
.dockerignore# Git files .git/ .gitignore # app build result api-contact-form # OS generated files .DS_Store Thumbs.db # Editor directories and files .vscode/ .idea/ *.sublime-project *.sublime-workspace # Dependency directories vendor/ Godeps/ node_modules/ # Go build artifacts /bin/ /build/ /pkg/ *.exe *.dll *.so *.dylib # Logs and temporary files *.log *.tmp *.swp *.swo *.bak *.old # Test binaries and coverage reports *.test coverage.out # Environment and configuration files .env # Miscellaneous *.md *.markdown # Ignore Docker-specific files if not needed in the image docker-compose.yml Dockerfile
Docker Compose
Orchestrates multi-container Docker applications, managing services like the API and the database seamlessly. It defines how containers should be built, their configurations, networks, and volumes.
docker-compose.yamlservices: # MariaDB Service mariadb-contact-form: image: mariadb:latest container_name: mariadb-contact-form restart: on-failure env_file: - .env environment: - MYSQL_ROOT_PASSWORD=${MYSQL_ROOT_PASSWORD} - MYSQL_DATABASE=${MYSQL_DATABASE} - MYSQL_USER=${MYSQL_USER} - MYSQL_PASSWORD=${MYSQL_PASSWORD} # ports: # - "${HOST_MARIADB_PORT}:${CONT_MARIADB_PORT}" volumes: - mariadb-contact-form-data:/var/lib/mysql networks: - contact-form-network-database # PHPMyAdmin Service phpmyadmin-contact-form: image: phpmyadmin/phpmyadmin:latest container_name: phpmyadmin-contact-form restart: on-failure environment: - PMA_HOST=mariadb-contact-form - PMA_PORT=${CONT_MARIADB_PORT} env_file: - .env ports: - "${HOST_PHPMYADMIN_PORT}:${CONT_PHPMYADMIN_PORT}" depends_on: - mariadb-contact-form networks: - contact-form-network-database # API Contact Form Service api-contact-form: build: . image: api-contact-form:1.0.0 container_name: api-contact-form restart: on-failure depends_on: - mariadb-contact-form env_file: - .env ports: - "${HOST_API_PORT}:${CONT_API_PORT}" environment: - APP_PORT=${CONT_API_PORT} - APP_TIMEZONE=Asia/Jakarta - DB_HOST=mariadb-contact-form - DB_PORT=${CONT_MARIADB_PORT} - DB_USER=${MYSQL_USER} - DB_PASSWORD=${MYSQL_PASSWORD} - DB_NAME=${MYSQL_DATABASE} - CORS_ALLOWED_ORIGINS=http://localhost:8081,http://localhost:8082,http://cms-contact-form:8081,http://client-contact-form:8082 - CORS_ALLOWED_METHODS=GET,POST,PUT,DELETE,OPTIONS - CORS_ALLOWED_HEADERS=Origin,Content-Type,Accept,Authorization - CORS_ALLOW_CREDENTIALS=true - CORS_EXPOSE_HEADERS=Content-Length,Content-Type networks: - contact-form-network-database volumes: mariadb-contact-form-data: networks: contact-form-network-database: driver: bridge
.envDouble-check that the
.envfile reflects the proper Docker-related environment variables:... ... ... # Database Configuration DB_HOST=mariadb-contact-form DB_PORT=3306 DB_USER=user DB_PASSWORD=password DB_NAME=contactsdb ## ## THIS CONFIG FOR DOCKER-COMPOSE.YAML ONLY, NOT FOR THE APP ## # Database Configuration MYSQL_ROOT_PASSWORD=rootpassword MYSQL_DATABASE=contactsdb MYSQL_USER=user MYSQL_PASSWORD=password # Port Mapping Configuration HOST_MARIADB_PORT=3306 CONT_MARIADB_PORT=3306 HOST_PHPMYADMIN_PORT=8011 CONT_PHPMYADMIN_PORT=80 HOST_API_PORT=8080 CONT_API_PORT=8080
Step 14: Building and Running the Containerized Application
With the configuration and setup complete, it's time to build and run your application.
Building the Docker Image
Navigate to the project root directory and build the Docker image using Docker Compose.
docker compose buildRun multiple Docker Container
After that run container using this command:
docker compose up -d-d: Runs containers in detached mode.
Verifying Container Status
Ensure all containers are up and running without issues.
docker compose psYou should see entries for the API and the database services, both marked as Up.
Conclusion
Congratulations! 🎉 You've successfully built a Contact Form API using Golang, GORM, MariaDB, and Docker. This API is capable of handling contact submissions efficiently, ensuring data integrity and providing a seamless experience for both users and service providers. By containerizing the application with Docker, you've set the foundation for easy deployment and scalability, making it adaptable to various environments and workloads.
Suggested Next Steps for Improvement
To further enhance your Contact Form API, consider implementing these improvements:
Authentication and Authorization:
- Secure your API endpoints to ensure that only authorized users can perform CRUD operations.
- Implement JWT (JSON Web Tokens) or OAuth2 for robust security mechanisms.
Logging and Monitoring
- Utilize monitoring tools such as Prometheus and Grafana to track application performance and health metrics.
API Documentation
- Use tools like Swagger or Go Swagger to generate interactive API documentation.
- Ensure that all endpoints, request parameters, and responses are well-documented for ease of use by front-end developers and third-party integrations.
Unit Testing
- Implement unit tests and integration tests to ensure the reliability and correctness of your API.
CI/CD Pipelines
- Set up Continuous Integration and Continuous Deployment pipelines using tools like GitHub Actions, GitLab CI/CD, or Jenkins to automate testing, building, and deployment processes.
Scalability Enhancements
- Optimize your Docker setup for production by implementing health checks.
- Consider using Kubernetes for managing multiple containers and scaling your application
By continuously iterating and enhancing your API, you ensure that it remains robust, secure, and adaptable to evolving requirements and technologies.