Creating a Simple Contact Form Web Using Next.js (React), Integrating API, and Docker
Introduction
This article has a related root article:
In this article, we'll walk through the process of deploying a Next.js (React) application using Docker. We'll use node:alpine as the builder to compile the application and nginx to serve the static files. This approach streamlines the deployment process and optimizes resource usage.
This article is a continuation of our previous discussion on deploying with Docker Compose. If you're not familiar with that setup, we recommend reading the Manage Multiple Containers Using Docker Compose to get up to speed.
Prerequisites
- Node.js and npm: Install from the official website.
- Docker & Docker Compose: Install Docker from the Docker official website.
- Basic Knowledge: Familiarity with React, Next.js, Docker & Docker Compose.💡
For more details about Docker Basics & Docker Compose check these article:
Project Structure
Before we begin, let's define the structure of our project:
📂 nextjs-contact-form/
├── 📂 src/
│   └── 📂 app/
│       ├── 📂 api/
│       │   └── 📂 contact/
│       │       └── 📄 route.js
│       ├── 📂 thank-you/
│       │   └── 📄 page.js
│       ├── 📄 globals.css
│       ├── 📄 layout.js
│       └── 📄 page.js
├── 📄 .dockerignore
├── 📄 .env.local
├── 📄 .env.example
├── 📄 Dockerfile
├── 📄 next.config.js
├── 📄 package.json
├── 📄 package-lock.json
└── 📄 tailwind.config.js
Step 1: Creating the Next.js Application
Initialize a new Next.js application:
npx create-next-app@latest client-contact-formIt will ask yo come configurations, follow this preferences:
✔ Would you like to use TypeScript? … No / Yes (NO)
✔ Would you like to use ESLint? … No / Yes (NO)
✔ Would you like to use Tailwind CSS? … No / Yes (YES)
✔ Would you like your code inside a `src/` directory? … No / Yes (YES)
✔ Would you like to use App Router? (recommended) … No / Yes (YES)
✔ Would you like to use Turbopack for next dev? … No / Yes (NO)
✔ Would you like to customize the import alias (@/* by default)? … No / Yes (NO)
wait until script finish create the project files, once finished cd to that directory:
cd client-contact-formStep 2: Update Next.js Configuration
We need to configure Next.js to export the app as standalone for Docker compatibility.
next.config.mjs
/** @type {import('next').NextConfig} */
const nextConfig = {
    output: "standalone",
};

export default nextConfig;
package.json
Ensure your package.json includes the necessary scripts for building and exporting the app using npm.
{
  "name": "client-contact-form",
  "version": "1.0.0",
  "private": true,
  "scripts": {
    "dev": "next dev",
    "build": "next build",
    "start": "next start"
  },
  "dependencies": {
    "bootstrap": "^5.3.0",
    "next": "13.4.12",
    "react": "18.2.0",
    "react-dom": "18.2.0"
  },
  "devDependencies": {
    "autoprefixer": "^10.4.20",
    "postcss": "^8.4.47",
    "tailwindcss": "^3.4.14"
  }
}
Step 3: Install Dependencies
We install all dependencies into our Next.js application.
npm installStep 4: Preparing Contact Form Page
Setup several pages and assets for the contact form.
src/app/thank-you/page.js
'use client';

import Link from 'next/link';

export default function ThankYou() {
  return (
    <div className="container mt-5 text-center">
      <h2>Thank You!</h2>
      <p>Your contact has been submitted successfully.</p>
      <Link href="/" className="btn btn-primary">
        OK
      </Link>
    </div>
  );
}
src/app/layout.js
import 'bootstrap/dist/css/bootstrap.min.css';
import './globals.css';

export const metadata = {
  title: 'Contact Form',
  description: 'A simple contact form built with Next.js and React.',
};

export default function RootLayout({ children }) {
  return (
    <html lang="en">
      <body>
        {children}
      </body>
    </html>
  );
}
src/app/page.js
'use client';

import { useState } from 'react';
import { useRouter } from 'next/navigation';

export default function Home() {
  const router = useRouter();
  const [formData, setFormData] = useState({
    name: '',
    email: '',
    phone: '',
    message: '',
  });
  const [errors, setErrors] = useState({});
  const [apiError, setApiError] = useState('');

  const handleChange = (e) => {
    setFormData({
      ...formData,
      [e.target.name]: e.target.value,
    });
    // Clear error on change
    setErrors({
      ...errors,
      [e.target.name]: '',
    });
    setApiError('');
  };

  const validate = () => {
    const newErrors = {};
    if (!formData.name.trim()) newErrors.name = 'Name is required.';
    if (!formData.email.trim()) {
      newErrors.email = 'Email is required.';
    } else if (
      !/^[A-Z0-9._%+-]+@[A-Z0-9.-]+\.[A-Z]{2,}$/i.test(formData.email)
    ) {
      newErrors.email = 'Invalid email address.';
    }
    if (!formData.phone.trim()) newErrors.phone = 'Phone is required.';
    if (!formData.message.trim()) newErrors.message = 'Message is required.';

    return newErrors;
  };

  const handleSubmit = async (e) => {
    e.preventDefault();
    const validationErrors = validate();
    if (Object.keys(validationErrors).length > 0) {
      setErrors(validationErrors);
      return;
    }

    try {
      const response = await fetch('/api/contact', {
        method: 'POST',
        headers: {
          'Content-Type': 'application/json',
        },
        body: JSON.stringify(formData),
      });

      if (response.ok) {
        router.push('/thank-you');
      } else {
        const data = await response.json();
        setApiError(
          data.message || 'An error occurred while submitting the form.'
        );
      }
    } catch (error) {
      setApiError('Failed to connect to the server.');
    }
  };

  return (
    <div className="container mt-5">
      {apiError && (
        <div className="alert alert-danger" role="alert">
          {apiError}
        </div>
      )}
      <form onSubmit={handleSubmit} noValidate>
        {/* Name Field */}
        <div className="mb-3">
          <label htmlFor="name" className="form-label">
            Name<span className="text-danger">*</span>
          </label>
          <input
            type="text"
            className={`form-control ${errors.name && 'is-invalid'}`}
            id="name"
            name="name"
            value={formData.name}
            onChange={handleChange}
            required
          />
          {errors.name && (
            <div className="invalid-feedback">{errors.name}</div>
          )}
        </div>

        {/* Email Field */}
        <div className="mb-3">
          <label htmlFor="email" className="form-label">
            Email<span className="text-danger">*</span>
          </label>
          <input
            type="email"
            className={`form-control ${errors.email && 'is-invalid'}`}
            id="email"
            name="email"
            value={formData.email}
            onChange={handleChange}
            required
          />
          {errors.email && (
            <div className="invalid-feedback">{errors.email}</div>
          )}
        </div>

        {/* Phone Field */}
        <div className="mb-3">
          <label htmlFor="phone" className="form-label">
            Phone<span className="text-danger">*</span>
          </label>
          <input
            type="text"
            className={`form-control ${errors.phone && 'is-invalid'}`}
            id="phone"
            name="phone"
            value={formData.phone}
            onChange={handleChange}
            required
          />
          {errors.phone && (
            <div className="invalid-feedback">{errors.phone}</div>
          )}
        </div>

        {/* Message Field */}
        <div className="mb-3">
          <label htmlFor="message" className="form-label">
            Message<span className="text-danger">*</span>
          </label>
          <textarea
            className={`form-control ${errors.message && 'is-invalid'}`}
            id="message"
            name="message"
            rows="3"
            value={formData.message}
            onChange={handleChange}
            required
          ></textarea>
          {errors.message && (
            <div className="invalid-feedback">{errors.message}</div>
          )}
        </div>

        <button type="submit" className="btn btn-primary">
          Submit
        </button>
      </form>
    </div>
  );
}
src/app/global.css
@tailwind base;
@tailwind components;
@tailwind utilities;
Step 5: Implementing API Routes
Create an API route to handle form submissions.
src/app/api/contact/route.js
export async function POST(request) {
    const { name, email, phone, message } = await request.json();

    try {
      const response = await fetch(`${process.env.API_URL}/contacts`, {
        method: 'POST',
        headers: {
          'Content-Type': 'application/json',
        },
        body: JSON.stringify({ name, email, phone, message }),
      });

      const data = await response.json();

      if (response.ok) {
        return new Response(JSON.stringify(data), { status: 200 });
      } else {
        return new Response(
          JSON.stringify({
            message: data.message || 'Error submitting contact form.',
          }),
          { status: response.status }
        );
      }
    } catch (error) {
      return new Response(
        JSON.stringify({ message: 'Failed to connect to the API.' }),
        { status: 500 }
      );
    }
  }
Step 6: Setting Up Environment Variables
Create a .env.local file to store environment variables.
API_URL=http://localhost:8080Step 6: Run Application Locally
Before containerizing the application with Docker, it’s important to run it locally to ensure everything works as expected. Start the application locally using:
npm run devready started server on 0.0.0.0:3000, url: http://localhost:3000
Step 7: Dockerizing the Application
Containerizing your application ensures consistency across different environments and simplifies deployment.
Dockerfile
Contains instructions to build the Docker image for the Contact Form Web. It typically includes steps like setting the base image, installing dependencies, copying source code, building the application, and specifying the command to run the application.
Dockerfile# Stage 1: Build the Next.js application FROM node:22.10.0-alpine AS builder # Set the working directory inside the container WORKDIR /app # Copy the rest of your application code COPY . . # Install dependencies RUN npm install # Build the Next.js application RUN npm run build # Stage 2: Create the production image FROM node:22.10.0-alpine # Set the working directory inside the container WORKDIR /app # Create user and group for application # # Create a group with GID 1001 RUN addgroup -g 1001 nodejs # Create a user with UID 1001 and assign them to the 'binarygroup' group RUN adduser -D -u 1001 -G nodejs nextjs # Set the correct permission for .next folder RUN mkdir .next RUN chown nextjs:nodejs .next # Automatically leverage output traces to reduce image size # https://nextjs.org/docs/advanced-features/output-file-tracing COPY --from=builder --chown=nextjs:nodejs /app/.next/standalone ./ COPY --from=builder --chown=nextjs:nodejs /app/.next/static ./.next/static # Switch to the nextjs user USER nextjs # Required environment variables ENV NODE_ENV production # set app port ENV PORT 3000 # set hostname to localhost ENV HOSTNAME "0.0.0.0" # expose port EXPOSE 3000 # server.js is created by next build from the standalone output # https://nextjs.org/docs/pages/api-reference/next-config-js/output CMD ["node", "server.js"]
.dockerignore
Specifies files and directories to exclude from the Docker build context, optimizing build performance and enhancing security by preventing unnecessary or sensitive files from being included in the Docker image.
.dockerignore# Node.js dependencies node_modules # Next.js build outputs .next out # Logs logs *.log npm-debug.log* # OS-specific files .DS_Store Thumbs.db # Git repository files .git .gitignore # Environment variables .env.local # Documentation and other miscellaneous files README.md *.md # Optional: Exclude Docker-related files if not needed inside the container # Uncomment the following lines if you don't want to include these files in the build context Dockerfile docker-compose.yml # Exclude any other directories or files that are not necessary for the build # For example, test directories, local scripts, etc. tests/ scripts/
Docker Compose
Orchestrates multi-container Docker applications, managing services like the API and the database seamlessly. It defines how containers should be built, their configurations, networks, and volumes.
docker-compose.yamlservices: # Embed UI for submiting contact form from client side client-contact-form: build: . image: client-contact-form:1.0.0 container_name: client-contact-form restart: on-failure ports: - "3000:3000" environment: - API_URL=http://host.docker.internal:8080
Step 8: Building and Running the Application
With the configuration and setup complete, it's time to build and run your application.
Building the Docker Image
Navigate to the project root directory and build the Docker image using Docker Compose.
docker compose buildRun multiple Docker Container
After that run container using this command:
docker compose up -d-d: Runs containers in detached mode.
Verifying Container Status
Ensure all containers are up and running without issues.
docker compose psYou should see application marked as Up.
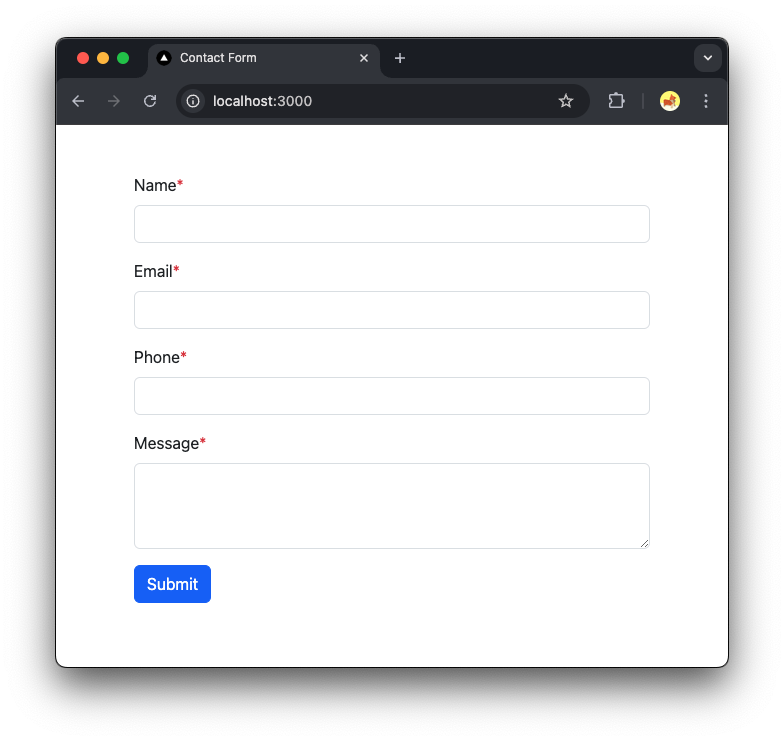
Verify the Deployment
Open your browser and navigate to http://localhost:3000 to see your deployed Next.js contact form application.
Suggested Next Steps for Improvement
Implement Anti-Spam
- CAPTCHA Integration, to protect your contact form from spam and abuse.
- Rate Limiting, implement rate limiting to prevent massive form submissions from the same IP address.
HTTPS Configuration
- Secure Your Application: For production deployments, use HTTPS for web applications to improve security.
Conclusion
By following this step-by-step guide, you've successfully deployed a Next.js application using Docker in a single container setup. This approach leverages Docker's multi-stage builds to create an optimized, production-ready deployment. Implementing the suggested best practices will further enhance your application's performance, security, and maintainability.